

Anchor
產品product
 點擊圖片放大
Anchor 尼龍壁虎 塑膠壁虎
規格介紹:Anchor 尼龍壁虎 塑膠壁虎
Plastic Anchor 6/8/10 尼龍壁虎 塑膠壁虎
Plastic Anchorr 6/8/10 尼龍壁虎 塑膠壁虎
塑膠壁虎
一、產品介紹
塑膠壁虎是一種用於牆面固定的塑膠膨脹式固定件,通常搭配螺絲使用。當螺絲旋入壁虎後,壁虎會在牆體內部膨脹,形成固定效果,使螺絲能穩固地固定於牆面。
塑膠壁虎具有安裝簡單、使用方便、重量輕及成本經濟等特點,廣泛應用於家庭修繕、DIY、室內裝修、五金安裝及輕型物品固定。
依不同產品設計,可適用於混凝土、磚牆、石膏板及其他適合的牆面材料。
二、使用教學
第一步:確認牆面材質
使用前先確認牆面材質,例如:
- 混凝土
- 水泥牆
- 磚牆
- 石膏板
- 其他板材
不同牆面應選擇相對應的壁虎種類。
第二步:選擇適合尺寸
依照:
- 螺絲尺寸
- 壁虎尺寸
- 固定物重量
- 牆面材質
選擇適當的塑膠壁虎。
第三步:鑽孔
使用適合尺寸的鑽頭,在牆面鑽出安裝孔。
鑽孔直徑應依壁虎規格選擇,並將孔內的灰塵及碎屑清除乾淨。
第四步:放入壁虎
將塑膠壁虎插入鑽孔內,直到壁虎前端與牆面平齊,或達到產品規定的安裝深度。
第五步:鎖入螺絲
將螺絲穿過需要固定的物品,再旋入塑膠壁虎。
隨著螺絲旋入,壁虎會在牆體內部產生膨脹,增加固定效果。
第六步:確認固定
安裝完成後,確認:
- 壁虎沒有鬆動
- 螺絲已充分鎖入
- 固定物安裝牢固
- 牆面沒有裂痕或損壞
確認安全後即可使用。
三、常見用途
| 應用 | 說明 |
|---|---|
| 家庭修繕 | 固定家庭用品及小型設備 |
| DIY | DIY 安裝及居家施工 |
| 掛鉤安裝 | 固定牆面掛鉤 |
| 壁掛架 | 安裝輕型壁掛架 |
| 收納用品 | 固定置物架及收納配件 |
| 裝飾用品 | 固定畫框及裝飾品 |
| 燈具配件 | 固定部分輕型燈具配件 |
| 五金安裝 | 各類輕型五金固定 |
四、使用注意事項
- 依牆面材質選擇適合的壁虎。
- 鑽孔直徑應符合壁虎產品規格。
- 鑽孔深度應足以容納壁虎。
- 安裝前應清除孔內灰塵及碎屑。
- 不同牆面材質會影響實際承載能力。
- 不得超過產品規定的使用荷重。
- 石膏板或中空牆面應使用適合該材料的專用壁虎。
- 高負載或安全相關用途,建議先進行實際安裝及荷重測試。
- 安裝完成後應定期確認是否有鬆動或牆面損壞。
Plastic Wall Anchor
1. Product Introduction
Plastic Wall Anchors are plastic expansion fasteners designed for wall mounting and are typically used together with screws.
When the screw is driven into the anchor, the anchor expands inside the wall material, creating a secure fastening point.
Plastic Wall Anchors feature easy installation, lightweight construction and cost-effective performance, making them widely used for home improvement, DIY projects, interior installation, hardware applications and light-duty mounting.
Depending on the design, Plastic Wall Anchors can be used with suitable substrates such as concrete, cement walls, brick and drywall.
2. Installation Guide
Step 1: Identify the Wall Material
Before installation, identify the wall material, such as:
- Concrete
- Cement wall
- Brick
- Drywall
- Other suitable panels
Select an anchor designed for the specific substrate.
Step 2: Select the Correct Size
Choose the appropriate Plastic Wall Anchor according to:
- Screw size
- Anchor size
- Weight of the mounted item
- Wall material
Step 3: Drill the Hole
Use a suitable drill bit to create the mounting hole.
The hole diameter should comply with the anchor specification. Remove dust and debris from the hole before installation.
Step 4: Insert the Anchor
Insert the Plastic Wall Anchor into the drilled hole until the anchor head is flush with the wall or reaches the specified installation depth.
Step 5: Install the Screw
Place the item to be mounted in position and drive the screw through the item and into the Plastic Wall Anchor.
As the screw is driven in, the anchor expands inside the wall, providing additional fastening support.
Step 6: Check the Installation
After installation, check that:
- The anchor is securely installed
- The screw is properly engaged
- The mounted item is firmly secured
- There are no visible cracks or damage to the wall
The installation is complete once the assembly has been confirmed to be secure.
3. Typical Applications
| Application | Description |
|---|---|
| Home Improvement | Mounting household items and light fixtures |
| DIY Projects | Home DIY installation and repairs |
| Hook Mounting | Installing wall-mounted hooks |
| Wall-Mounted Fixtures | Installing lightweight wall fixtures |
| Storage Accessories | Mounting shelves and storage accessories |
| Decorative Items | Mounting frames and decorative accessories |
| Lighting Accessories | Mounting suitable lightweight lighting components |
| Hardware Installation | General light-duty hardware fastening |
4. Usage & Safety Notes
- Select the appropriate wall anchor according to the wall material.
- The drilled hole diameter must comply with the anchor specification.
- The hole depth should be sufficient to accommodate the anchor.
- Remove dust and debris from the hole before installation.
- Actual load capacity depends on the wall material, anchor design, screw size and installation method.
- Do not exceed the specified working load.
- For drywall or hollow walls, use an anchor specifically designed for the substrate.
- For high-load or safety-critical applications, actual installation and load testing are recommended.
- Periodically check the installation for looseness, damage or deterioration.
更多商品
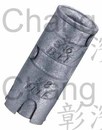
Single Expansion Anchor-64L
Single Expansion Anchor-64L 64L Single Expansion Anchor Zinc Alloy Unit:inch Item Nr. Size Material Dimensions (inch) Thread Dia. B C D - 1/4 Zinc Alloy 1/4 1/2 1 5/16 - - 5/16 Zinc Alloy 5/16 5/8 1 1/2 - - 3/8 Zinc Alloy 3/8 3/4 1 1/2 - - 1/2 Zinc Alloy 1/2 7/8 2 - - 5/8 Zinc Alloy 5/8 1 2 5/8 -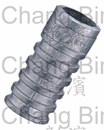
Lag Screw Shields-64K-鋅合金壁虎
Lag Screw Shields-64K-鋅合金壁虎-鋅合金壁虎 64K Lag Screw Shields Zinc Alloy Unit: inch Item Nr. Size Material Dimensions (inch) Thread Dia. A B C D 1/4 Zinc Alloy 1/4 - 1/2 1 - 1/4 Zinc Alloy 1/4 - 1/2 1 1/2 - 5/16 Zinc Alloy 5/16 - 1/2 1 1/4 - 5/16 Zinc Alloy 5/16 - 1/2 1 3/4 - 3/8 Zinc Alloy 3/8 - 5/8 1 3/4 - 3/8 Zinc Alloy 3/8 - 5/8 2 7/16 - 1/2 Zinc Alloy 1/2 - 3/4 2 - 1/2 Zinc Alloy 1/2 - 3/4 3 -
Spring Toggle-4300108
Spring Toggle - Hook-43C
Low Profile Wire Rope Clip-66
Wall Plug-6410049
Wall Plug-6410049塑膠尼龍壁虎 64G Wall Plug nylon Unit: mm Item Nr. Size Color Dimensions (mm) A C - - - 5mm Grey 5.0 25.5 - - - 6mm Grey 6.0 30.0 - - - 7mm Grey 7.0 35.0 - - - 6480040 8mm Grey 8.0 40.0 - - - 6410049 10mm Grey 10.0 49.0 - - - Wall Plug 產品介紹 / Product Description 中文描述:Wall Plug(壁虎/膨脹管) 是一種常見的固定配件,用於將螺絲穩固安裝在磚牆、水泥牆、石膏板或其他基材中。當螺絲鎖入膨脹管內時,管體會在牆內膨脹產生抓力,使螺絲固定更穩固,避免滑動或脫落。廣泛應用於家具安裝、掛鉤、層架、燈具、電視架等。 產品特點: 適用多種牆面:水泥牆、紅磚牆、石膏牆等皆可使用 多種尺寸規格:從Ø4mm到Ø12mm等,對應不同螺絲尺寸與承重需求 操作簡便:配合電鑽與螺絲即可完成安裝 耐用材質:高品質塑膠或尼龍製成,耐拉、抗老化 經濟實用:小成本即可提升安裝穩定性 English Description:Wall Plugs, also known as plastic anchors or expansion plugs, are used to anchor screws in walls made of materials like concrete, brick, drywall, or plaster. When a screw is driven into the plug, it expands and grips the inside of the hole, ensuring a secure hold. Widely used for mounting furniture, hooks, shelves, lighting fixtures, and TV brackets. Product Features: Compatible with many surfaces: Works on concrete, brick, drywall, and more Various sizes available: Ranges from Ø4mm to Ø12mm, for different loads and screws Easy to install: Requires only a drill and screwdriver Durable material: Made from quality plastic or nylon, strong and long-lasting Cost-effective solution: Enhances screw grip without expensive hardware 🔧 使用教學 / How to Use 中文使用說明: 選擇適當規格依螺絲尺寸與預定安裝物重量選擇適當長度與直徑的膨脹管。 鑽孔打洞使用與膨脹管外徑相符的鑽頭,在牆面鑽孔。 敲入膨脹管用橡膠錘或鐵鎚輕輕敲入膨脹管,讓其與牆面齊平。 鎖入螺絲將螺絲穿過安裝物件並鎖入膨脹管,螺絲轉入時會使膨脹管在牆內擴張固定。 English Instructions: Choose the right sizeSelect a plug size that matches the screw and the weight of the item to be mounted. Drill a holeUse a drill bit that matches the outer diameter of the wall plug to drill into the wall. Insert the plugTap the plug into the hole with a hammer until it is flush with the wall surface. Drive the screwPlace the screw through your item and drive it into the plug; it will expand to hold firmly in place.
Wall Plug-6438022
Wall Plug-6438022 Wall Plug 產品介紹 / Product Description 中文描述:Wall Plug(壁虎/膨脹管) 是一種常見的固定配件,用於將螺絲穩固安裝在磚牆、水泥牆、石膏板或其他基材中。當螺絲鎖入膨脹管內時,管體會在牆內膨脹產生抓力,使螺絲固定更穩固,避免滑動或脫落。廣泛應用於家具安裝、掛鉤、層架、燈具、電視架等。 產品特點: 適用多種牆面:水泥牆、紅磚牆、石膏牆等皆可使用 多種尺寸規格:從Ø4mm到Ø12mm等,對應不同螺絲尺寸與承重需求 操作簡便:配合電鑽與螺絲即可完成安裝 耐用材質:高品質塑膠或尼龍製成,耐拉、抗老化 經濟實用:小成本即可提升安裝穩定性 English Description:Wall Plugs, also known as plastic anchors or expansion plugs, are used to anchor screws in walls made of materials like concrete, brick, drywall, or plaster. When a screw is driven into the plug, it expands and grips the inside of the hole, ensuring a secure hold. Widely used for mounting furniture, hooks, shelves, lighting fixtures, and TV brackets. Product Features: Compatible with many surfaces: Works on concrete, brick, drywall, and more Various sizes available: Ranges from Ø4mm to Ø12mm, for different loads and screws Easy to install: Requires only a drill and screwdriver Durable material: Made from quality plastic or nylon, strong and long-lasting Cost-effective solution: Enhances screw grip without expensive hardware 🔧 使用教學 / How to Use 中文使用說明: 選擇適當規格依螺絲尺寸與預定安裝物重量選擇適當長度與直徑的膨脹管。 鑽孔打洞使用與膨脹管外徑相符的鑽頭,在牆面鑽孔。 敲入膨脹管用橡膠錘或鐵鎚輕輕敲入膨脹管,讓其與牆面齊平。 鎖入螺絲將螺絲穿過安裝物件並鎖入膨脹管,螺絲轉入時會使膨脹管在牆內擴張固定。 English Instructions: Choose the right sizeSelect a plug size that matches the screw and the weight of the item to be mounted. Drill a holeUse a drill bit that matches the outer diameter of the wall plug to drill into the wall. Insert the plugTap the plug into the hole with a hammer until it is flush with the wall surface. Drive the screwPlace the screw through your item and drive it into the plug; it will expand to hold firmly in place.
Wall Plug-6450025
Wall Plug-6450025 Wall Plug 產品介紹 / Product Description 中文描述:Wall Plug(壁虎/膨脹管) 是一種常見的固定配件,用於將螺絲穩固安裝在磚牆、水泥牆、石膏板或其他基材中。當螺絲鎖入膨脹管內時,管體會在牆內膨脹產生抓力,使螺絲固定更穩固,避免滑動或脫落。廣泛應用於家具安裝、掛鉤、層架、燈具、電視架等。 產品特點: 適用多種牆面:水泥牆、紅磚牆、石膏牆等皆可使用 多種尺寸規格:從Ø4mm到Ø12mm等,對應不同螺絲尺寸與承重需求 操作簡便:配合電鑽與螺絲即可完成安裝 耐用材質:高品質塑膠或尼龍製成,耐拉、抗老化 經濟實用:小成本即可提升安裝穩定性 English Description:Wall Plugs, also known as plastic anchors or expansion plugs, are used to anchor screws in walls made of materials like concrete, brick, drywall, or plaster. When a screw is driven into the plug, it expands and grips the inside of the hole, ensuring a secure hold. Widely used for mounting furniture, hooks, shelves, lighting fixtures, and TV brackets. Product Features: Compatible with many surfaces: Works on concrete, brick, drywall, and more Various sizes available: Ranges from Ø4mm to Ø12mm, for different loads and screws Easy to install: Requires only a drill and screwdriver Durable material: Made from quality plastic or nylon, strong and long-lasting Cost-effective solution: Enhances screw grip without expensive hardware 🔧 使用教學 / How to Use 中文使用說明: 選擇適當規格依螺絲尺寸與預定安裝物重量選擇適當長度與直徑的膨脹管。 鑽孔打洞使用與膨脹管外徑相符的鑽頭,在牆面鑽孔。 敲入膨脹管用橡膠錘或鐵鎚輕輕敲入膨脹管,讓其與牆面齊平。 鎖入螺絲將螺絲穿過安裝物件並鎖入膨脹管,螺絲轉入時會使膨脹管在牆內擴張固定。 English Instructions: Choose the right sizeSelect a plug size that matches the screw and the weight of the item to be mounted. Drill a holeUse a drill bit that matches the outer diameter of the wall plug to drill into the wall. Insert the plugTap the plug into the hole with a hammer until it is flush with the wall surface. Drive the screwPlace the screw through your item and drive it into the plug; it will expand to hold firmly in place.
